Working with The Editor
The Selection Tool

The Selection Tool is one of the most essential tools in IconVectors. Nearly all editing operations begin by selecting elements. Once selected, you can move, resize, rotate, group, or modify them using various commands or direct manipulation on the canvas - Press V

Selecting an Element
You can select an element using either of these methods:
Click: Click the border of the element.
List of Layers: Click on the element in the Layers list.
Selecting Multiple Elements
You can select multiple elements using either of these methods:
Shift-Click: Click one element, then hold Shift and Click additional elements.
Drag a selection box: Click and drag in an empty area to draw a rectangle around the elements you want to select.
Hint
Combine both methods by holding Shift while drawing a selection box to add more elements to an existing selection.
Shift-Clicking a selected element again will remove it from the selection.
Moving Elements
To move an element:
Position the mouse over the selected elements.
Press and hold the left mouse button.
Drag the element to a new position.
Release the mouse button.
Hint
You can also use the arrow keys to nudge the selected element:
Press Arrow Keys to move by 0.1 px
Press Shift + Arrow Keys to move by 1 px
Duplicating Elements
To duplicate an element while moving it:
With the mouse: Hold Alt then drag the element with the mouse.
With arrow keys: Hold Alt and use the arrow keys to move the duplicate.
Hint
You can combine duplication with precision movement using Alt + Shift + arrow keys for 1 px steps.
Scaling Elements
To scale an element:
Click the element to select it.
Hover over one of the side or corner resize handles.
When the two-way arrow appears, press and hold the mouse button.
Drag to scale the element, then release.
Hint
Hold Shift while scaling to preserve the aspect ratio. Hold Alt while scaling to scale using a central symetry.
Rotating Elements
To rotate an element:
Select the element or the group of elements.
Hover over a corner handle until the curved rotation arrow appears.
Drag to rotate the element.
Release when the desired angle is reached.
Hint
Hold Shift while rotating to constrain to 15° steps.
The Path Edition Tool

The Path Edition Tool lets you edit the structure of a vector path by modifying its anchor points and Bézier curves. This tool only works with path elements. If the element is a geometric primitive (such as a rectangle, ellipse, line, or polyline), you must first convert it to a path before editing.
Paths are made of anchor points (also known as nodes) and control points. Anchor points define the shape of the path, while control points control the curvature between them using Bézier curves. Depending on the type of anchor, a point may have 0, 1, or 2 control points.
Converting an Element to Path
Before using the Path Edition Tool on a shape, convert it to a path:
- Ctrl+B
Selecting Anchor Points
To select a single anchor point:
Click on the point with the mouse.
To select multiple anchor points:
:kbd:`Shift`+Click additional anchor points
Drag a rectangle around the anchor points to select them all at once
Moving Anchor Points
You can reposition anchor points using:
Mouse: Drag and drop the point to a new position
Arrow keys: - Arrow Keys to move by 0.1 px - Shift+Arrow Keys to move by 1 px
Adding an Anchor Point
To insert a new anchor point:
Hover the mouse over a path segment (line or curve)
Click once to insert a new point
Removing an Anchor Point
To delete an anchor point:
:kbd:`Alt`+Click on the anchor point
Or, select one or more points and press Del
This will remove the points and their connected segments, possibly opening the path.
Converting Anchor Points
To change the type of an anchor point:
:kbd:`Ctrl`+Click the anchor point
If it is a angle corner (no handles), it becomes a smooth point with two symmetrical handles
If it already has handles, it becomes a angle corner
Adjusting Control Points
To fine-tune the curve of a path:
Drag the control point with the mouse to reshape the curve
Hold Ctrl to move one handle independently (unlink mode)
Hold Alt to move both handles symmetrically around the anchor point (mirror mode)
Rounding Corner Points
When an anchor point is a corner (angular) point, the Path Edition Tool shows a small corner handle inside the angle. You can drag this handle to create a rounded corner directly.
Hover a corner point and look for the rounding handle inside the angle.
Click and drag the handle to set the curve size.
Release to apply the rounded corner.

Hint
If multiple anchor points are selected, dragging the handle applies the same rounding to all of them.
Double-click the rounding handle to enter an exact curve size (in pixels).
The handle stays visible so you can adjust the rounding later.
The Pen Tool

The Pen Tool is designed for creating precise polylines made of straight segments. It is ideal for drawing icons that require clean, geometric outlines or shapes. Once completed, these shapes become editable paths.
Creating a Polyline Path
To use the Pen Tool:
Click on the canvas to create the first point.
Continue clicking to place each additional point.
Each segment is a straight line connecting the points.
Creating Curves While Drawing
You can create curved segments directly while drawing:
Click and hold to place a point.
Move the mouse while still holding to pull out the Bézier handles.
Release to confirm the curve.
The next segment will start from that curve. This allows you to mix straight and curved segments in a single drawing, without switching tools.
Closing a Path
To create a closed polyline:
Hover the cursor over the first point until the mouse helper tooltip displays “Close Path”
Click to complete and close the polyline
Ending an Open Path
To create an open polyline:
Press Esc when you’re finished placing points
This will stop the current drawing and leave the path open
Closing an Open Path
If a path is open and you want to close it later, you can use the Pen Tool to do so:
Hover the cursor over the last point of the open path — the mouse helper will snap to it.
Click to reactivate the path.
Move the mouse to the first point of the path — when the helper displays “Close Path”, click to complete the shape.
The path is now closed and can be edited like any other closed shape.
Hint
Use this method when you forgot to close the path during creation or wish to turn an open line into a filled, closed shape.
Editing the Polyline Path
Once your path is created, you can edit its structure and curves using the Path Edition Tool.
Hint
The Pen Tool creates paths using sharp corner points. If you want to convert them to smooth curves, use the Path Edition Tool and convert anchor points as needed.
The Text Tool

The Text Tool converts typed text into vector paths that you can edit like any other shape. It uses the fonts installed on your system and creates one path per character. A group a created for each text added.
Using the Text Tool
Select the Text Tool in the toolbar (shortcut T).
Click on the canvas to set the baseline (vertical position) of the text.
In the dialog, choose a font and enter the text.
Click OK to insert the text or Cancel to abort.
Text Placement and Size
The text is scaled to the document width minus 2 px.
The first glyph starts at x = 1 px, leaving a 1 px margin on the left.
The baseline is the Y position where you clicked.
What Gets Created
A group containing one path per character.
Fill, stroke, opacity, and line settings use the current values from the Control Bar.
If you use gradients, they are preserved in the generated paths.
Editing Text After Creation
The text is converted to paths, so it is not editable as text. To change the wording or font later, delete the group and insert new text.
Note
The Text Tool is supported on Windows and macOS.
The Preview Panel
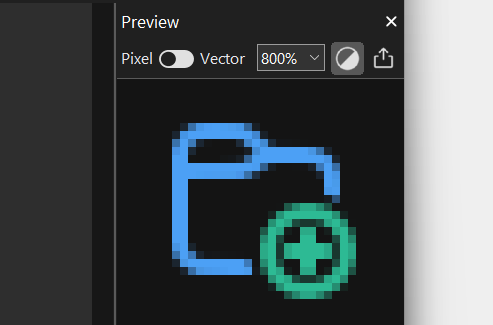
The Preview Panel displays a live preview of the final icon while you draw and edit. It is especially useful for checking legibility at small sizes and testing contrast on light and dark backgrounds.
By default, this panel is docked on the right side of the main window, above the Layer List.
Showing and Hiding the Panel
You can show or hide the Preview Panel from the menu:
- Ctrl+F8
Click the Close button (X) in the title bar to hide it.
Use the menu command (or shortcut) to show it again.
Docking and Undocking
You can undock the Preview Panel by dragging and dropping it using the title bar. To dock it again, drag it back to the right side of the workspace until the docking guides appear, then release.
Live Preview
The Preview Panel is live: the preview is updated automatically as you draw, move, or edit elements.
Preview Toolbar
The Preview Panel includes its own toolbar with the following commands:
Pixel / Vector toggle button - Pixel: Renders the icon as a bitmap using the native resolution. When zoomed, the preview remains pixelated. - Vector: Displays the icon with smooth vector rendering.
Scale Select the display scale (percentage). In Pixel mode the image is zoomed with visible pixels; in Vector mode the preview stays smooth.
Background Toggle between a light and dark background.
Export Export the preview as a bitmap image.
Drag & Drop Export
You can also drag the icon directly from the Preview Panel into another application. When you start dragging from the preview area, IconVectors writes a temporary SVG file and passes it to the target app (the app decides how to handle the dropped file).
When the mouse is over the preview area, a small hint appears at the bottom: “Drag & drop to export”.
The temporary files remain available while IconVectors is running and are removed when the application closes.
Place Files
The Place Files command lets you import one or more SVG files into the current document.
Menu:
Shortcut: Ctrl+Shift+P
To place SVG files:
Choose .
In the file selection dialog, select one or more SVG files and click Open.
IconVectors then adds the files to the current document:
A group is created for each SVG file you place.
Each imported artwork is automatically scaled to the current document size.
Tip
You can also drag & drop one or more SVG files from your file explorer directly into the workspace to insert them.
Place & Trace Bitmap
The Place & Trace Bitmap command imports a bitmap image and automatically traces it to create a vector path element in the current document.
Menu:
Note
This feature is intended for monochrome images (for example, black and white). If the image contains several colors, the tracing may produce unpredictable results.
For best results, use a high-resolution source image.
Tip
You can also drag & drop a bitmap image from your file explorer directly into the workspace to trace and insert it.