

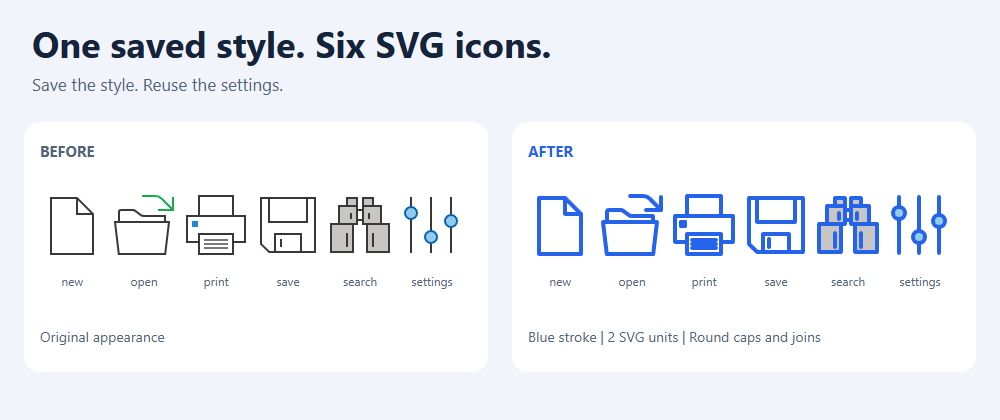
Save the style. Reuse the settings.
Configure an appearance once, save it as a named style, then reuse its stroke settings across six related SVG icons. Create separate styled copies so you can compare the results while keeping the sources intact.
This walkthrough ends with six styled SVG copies and unchanged source files. It uses real Axialis Office Pro artwork: new.svg, open.svg, print.svg, save.svg, search.svg and settings.svg.
Disclosure: we make IconVectors at Axialis. This workflow was tested on Windows in IconVectors 2.20; the screenshots show that interface.
Before you start
- Install IconVectors 2.20 or later, with a valid license or trial for file processing.
- Prepare six related SVGs you are allowed to modify, in a separate working folder. Keep your source library intact and use an empty output folder.
- Use artwork with compatible proportions and construction. A shared stroke does not correct differences in perspective, optical size or visual density.
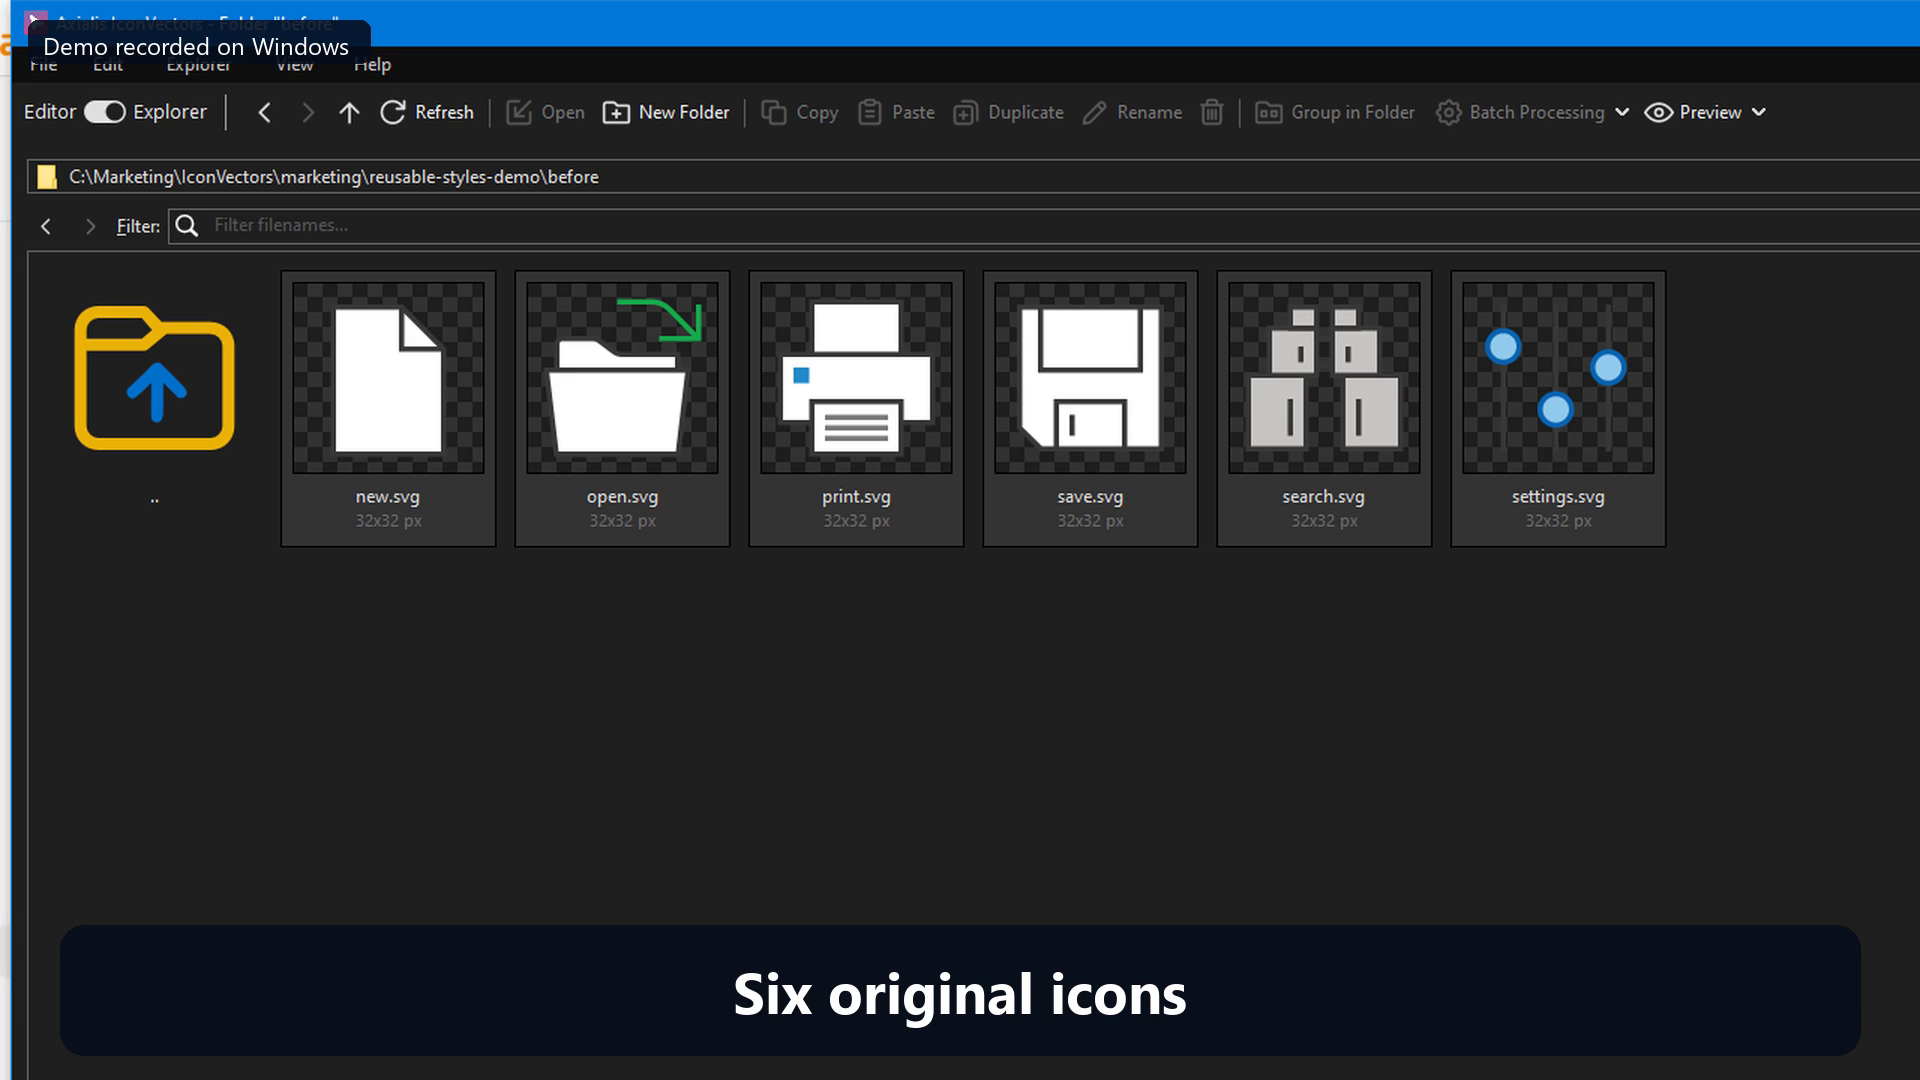
The six files used in the demonstration. The folder arrow is navigation, not a seventh source icon.
1. Configure the appearance on one drawable
Open a working copy of new.svg in the Editor. Select its outer page shape, rather than the parent group or the whole icon. With that single element selected, use the Control Bar's stroke controls to set:
- Stroke color:
#2563EB. - Stroke width:
2.00SVG units. - Line cap: Round.
- Line join: Round.
Keep the white fill. The saved appearance can include a fill even though you will later apply only its stroke settings. This example uses a solid, fully opaque stroke without dashes.
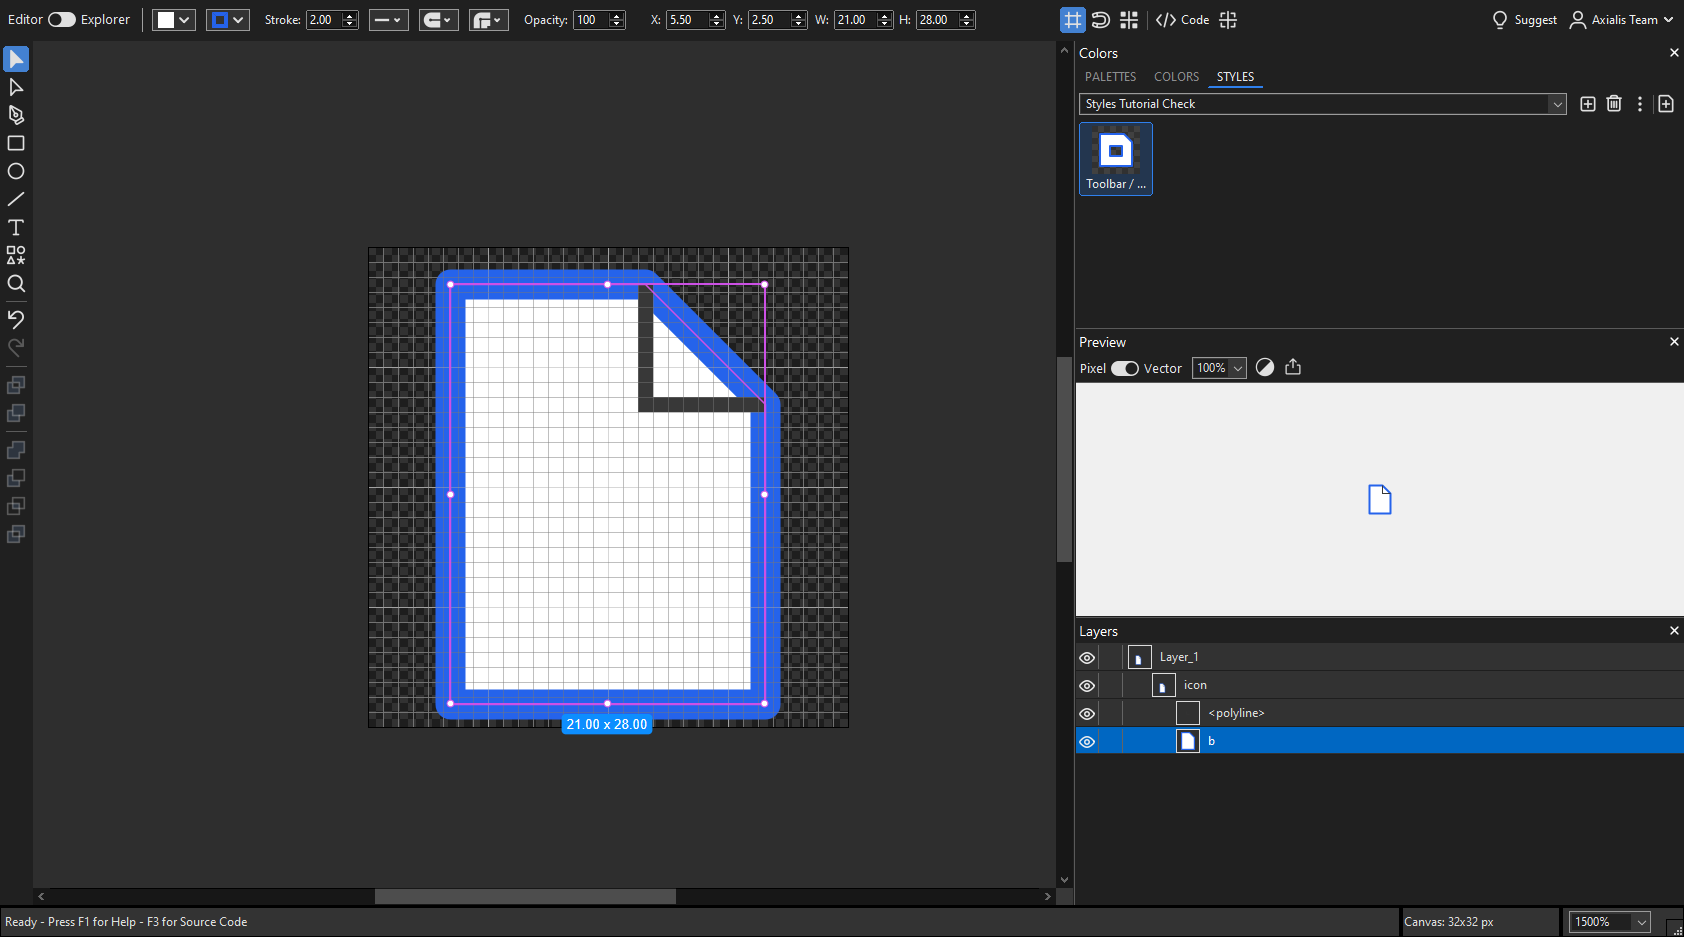
One drawable is the source of the preset. The separate fold detail has not been restyled at this preparation step.
2. Save that appearance as a reusable style
- Keep exactly one visible, unlocked drawable selected. A group or multiple elements cannot be the source for this single-style command.
- Open View → Colors, then choose the STYLES tab. Use Libraries if a Libraries / This Icon toggle is visible.
- Choose a library, such as My Styles, or create your own through Icon → Styles → New Style Library…. The screenshots use Styles Tutorial Check.
- Choose Icon → Styles → New Style from Selection…. The plus button beside the library selector invokes the same capture command.
- Replace the default name with
Toolbar / Outline / Blue, then click OK.
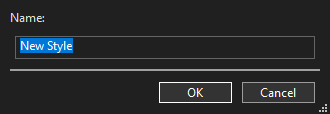
Enter your preset name in this dialog; the screenshot shows the default name before replacement.
The accepted preset is saved immediately in the selected library. Saving the SVG is a separate action. Save your reference icon as a separate working file if you want to retain that edit.
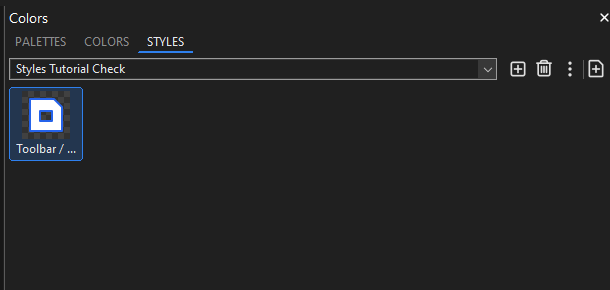
The preset stores appearance, not the page shape or its coordinates. Its small gallery sample does not mean the source geometry will replace your other icons.
3. Select the six files and choose Stroke only
Save any wanted edits and close the six source files in the Editor before batch processing. In Explorer, open the working folder and select exactly the six SVG files. Choose Explorer → Batch Processing → Apply Style….
In Batch Process: Apply Style, select your library and Toolbar / Outline / Blue. Set:
- Apply: Stroke only.
- Targets: All artwork.
- Output: Create Copies.
- Output folder: your empty destination folder.
- Filename suffix:
-styled. - Replace existing files: leave unchecked for this run.
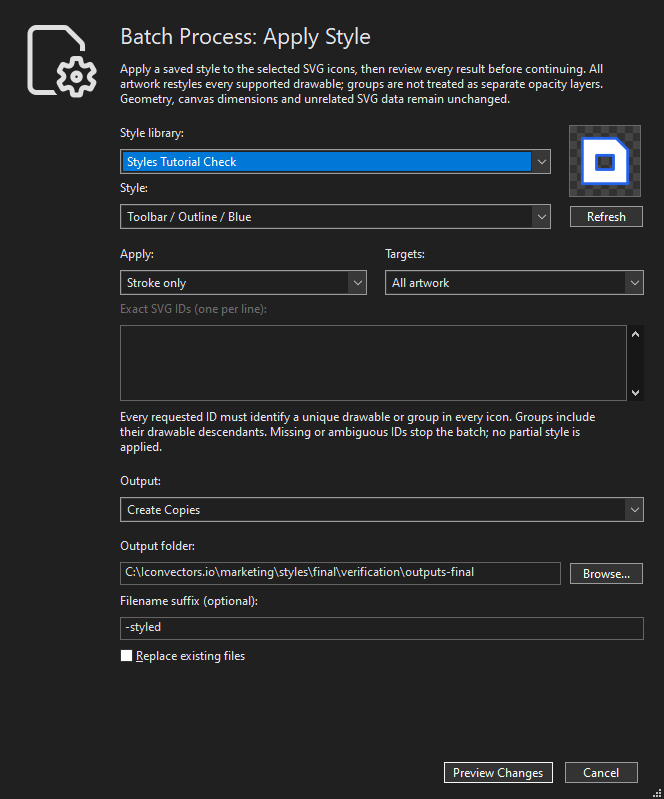
Choose Create Copies explicitly: the initial default is Modify Originals. Do not assume the dialog is still at its initial defaults; it remembers options.
Stroke only copies the stroke paint, stroke opacity, width, dashes, caps and joins. It retains fill properties and element opacity. Geometry, placement and canvas dimensions stay unchanged.
All artwork applies those settings to every supported drawable in each selected SVG, including descendants of groups. It is not limited to whatever was selected in the Editor. Treat it as restyling the artwork, rather than merely recoloring existing visible lines. Inspect filled details too.
4. Inspect the batch preview, then create the copies
Click Preview Changes. In Confirm Apply Style, check the library, preset, Stroke only mode, All artwork targets and destination. For this set, the preview shows 6 selected, 6 output files, 6 changed, and 0 unchanged, unsupported or failed. There are no existing files to replace.
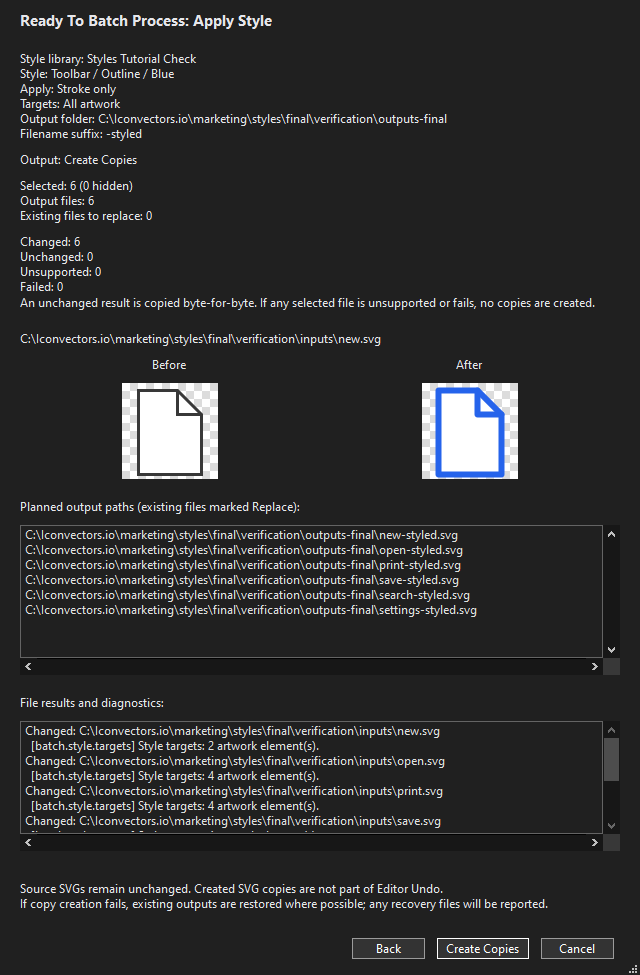
Read the per-file findings and every planned path. The representative image is a sample, not six individual visual inspections. Use Back if you need to change the preset or options, then build a fresh preview. Once the plan is correct, click Create Copies.
Explorer batch writes are outside Editor Undo. Creating copies preserves your inputs, but replacing an existing output would still modify that file.
5. Inspect all six results at their intended size
Open the destination folder and check for new-styled.svg, open-styled.svg, print-styled.svg, save-styled.svg, search-styled.svg and settings-styled.svg.
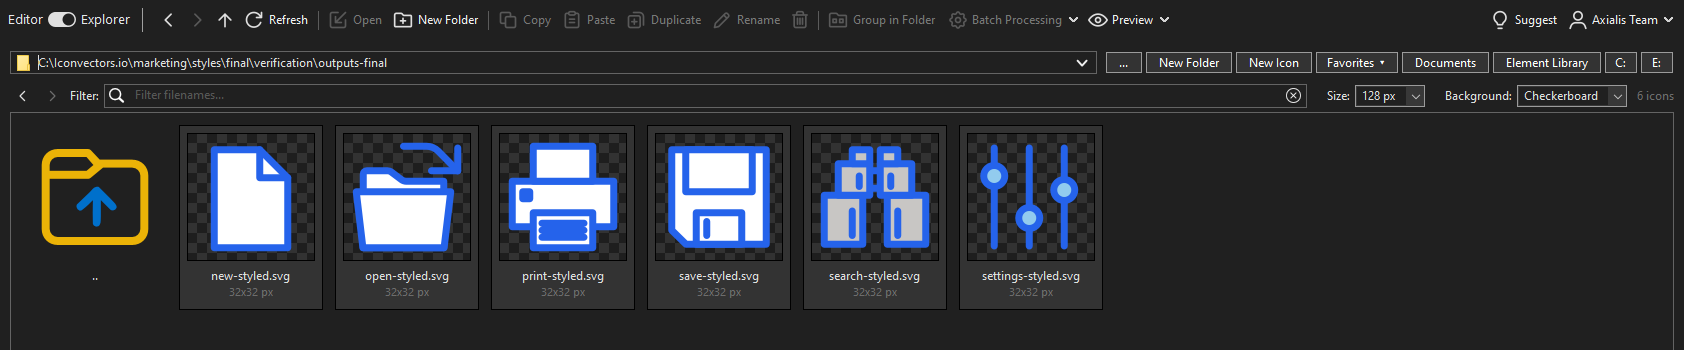
Open each result in the Editor and compare its outline and filled details with its source. Inspect every icon at its intended display size. Matching stroke settings does not guarantee balanced results on every shape: the two-unit stroke shown here makes some small details heavy, particularly the printer's horizontal lines. If details become crowded, reduce the preset's width and preview a new set of copies. The screenshots keep the two-unit setting so you can see that trade-off.
6. Change the preset later? Apply it again
A library preset is an independent snapshot. Editing it does not automatically update previously styled icons.
When you want that revision across a set, select the files again, choose the updated preset, review a fresh preview and create a new set of copies.
Technical notes — optional
- The demonstrated preset also uses full stroke opacity, no dash array, dash offset
0and miter limit4. To inspect or change these, right-click the saved preset, choose Edit Style…, review Stroke and Stroke geometry, then Save. Stroke only includes the miter limit and dash offset; round joins make the miter limit visually irrelevant here. - A preset using authored
colorand symboliccurrentColorcan be rejected in a partial mode if changing that shared context would alter the opposite paint. Follow the diagnostic; this example uses a fixed blue stroke. - SVG output may retain original stroke attributes with overriding inline style declarations. Inspect the effective style when reviewing source code.
- Embedded styles can link objects within one SVG. They are separate from library presets, which copy settings without creating a live link back to the library.
For setup and further details, see Working with Styles, Batch Apply Style, or the IconVectors homepage.
Start Making SVG Icons Today with IconVectors
Download the fully-functional 30‑Day Free Trial and unlock your icon design workflow.
IconVectors 2.20 for Windows, macOS and Linux.